Salesforce integration
Last updated: May 29, 2026
Quick overview
Airspeed has a deep integration with Salesforce that enables it to:
automatically update your fields on Contact, Account, Opportunity, and even custom objects;
log each call automatically to Salesforce as a Task or Event, with the call summary, duration, and Type;
automate win/loss analyses.
Inversely, Airspeed can:
read emails logged in your Salesforce to improve deal insights and summaries
include any information you already have in Salesforce to customize prep sheets generated by Airspeed. This is especially useful in case you work with data enrichment providers.
You can easily move between Airspeed and Salesforce as the relevant objects are interlinked.
Steps required to take advantage of Airspeed’s Salesforce integration:
Connect your Salesforce instance to Airspeed.
Define the information you’d like Airspeed to capture from your conversations and where in Salesforce it should be stored.
Enable autosync.
Connecting your Salesforce to Airspeed
You can connect Airspeed to Salesforce using the following simple steps:
Required Permissions
To support Airspeed's minimum CRM integration functionality, read access to the following object types is required:
Contact
Lead
Account
Opportunity
OpportunityStage
User
EmailMessage
To support Airspeed's CRM field syncing functionality, write access is required for any of the below that you plan on syncing data to:
Contact
Account
Opportunity
To support Notes syncing, read and write access is required for:
ContentNote
ContentDocumentLink
To support Call Activity Sync, read and write access is required for the activity object(s) you plan to use:
Task — required for the “Call Tasks only” mode and for telephony calls in “Smart mode”.
Event — required for the “Events only” mode and for video-conferencing calls in “Smart mode”.
EventRelation — required to associate multiple participants with a synced Event. This also requires Shared Activities to be enabled in your Salesforce org. Without it, only the primary contact will be linked to the Event.
Field-Level Security
If Airspeed cannot read specific fields, check the Field-Level Security settings:
In Salesforce, go to Setup > Object Manager.
Select the object (e.g., Contact, Account, or Opportunity).
Click on "Fields & Relationships".
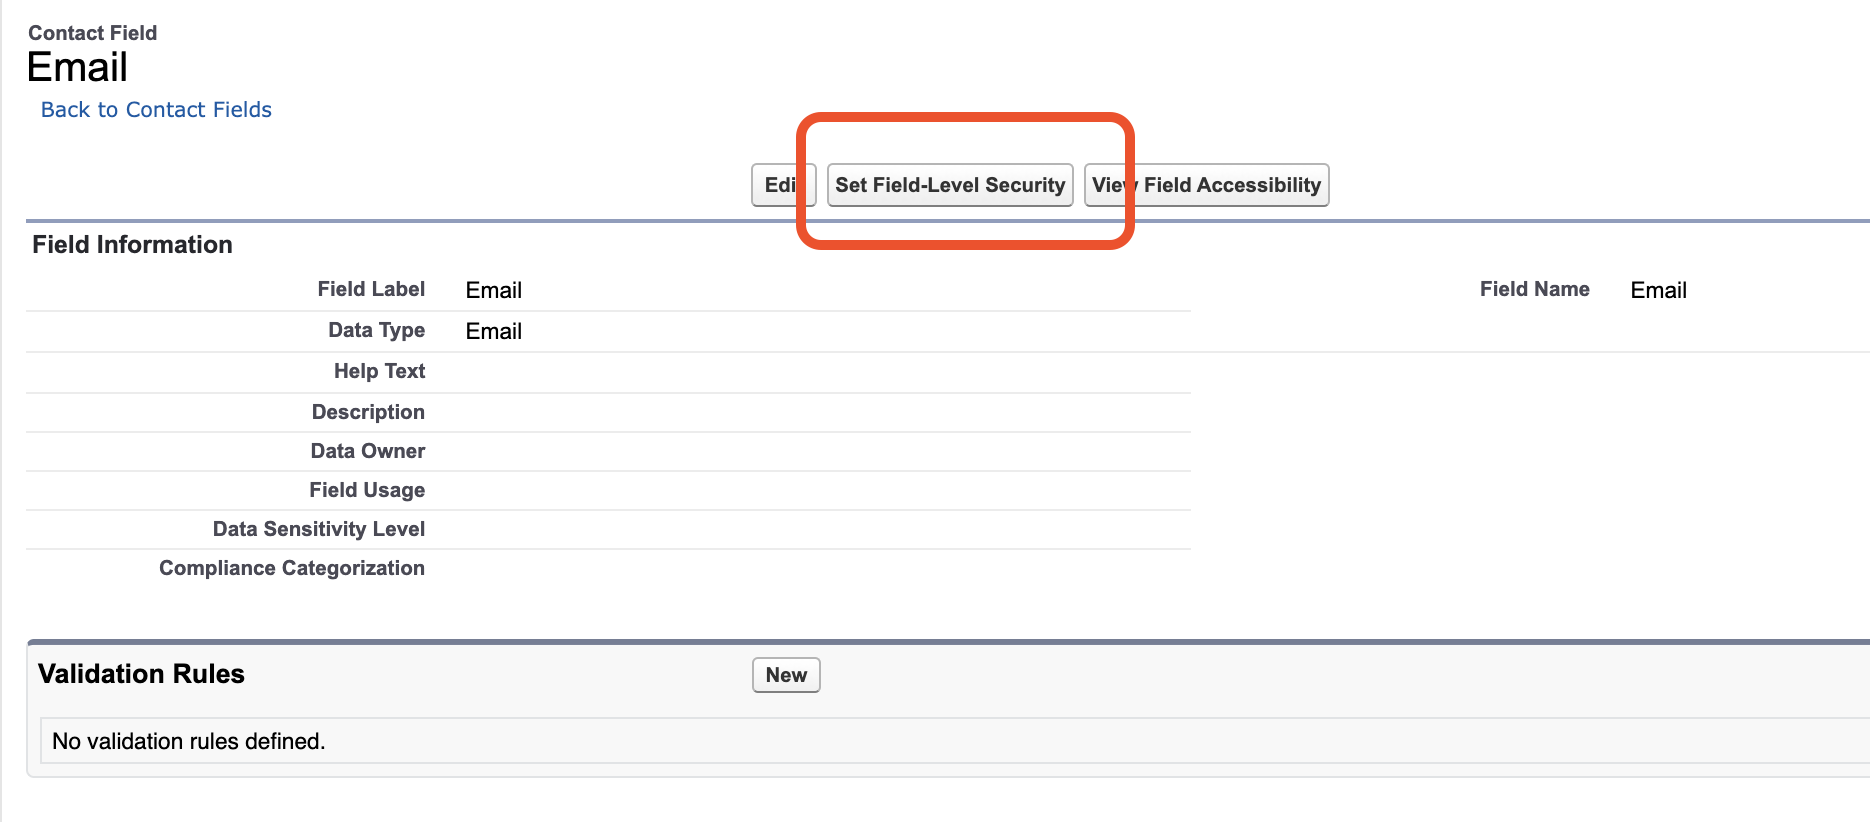
Click on the field name (e.g., Email for Contact).
Click "Set Field-Level Security".
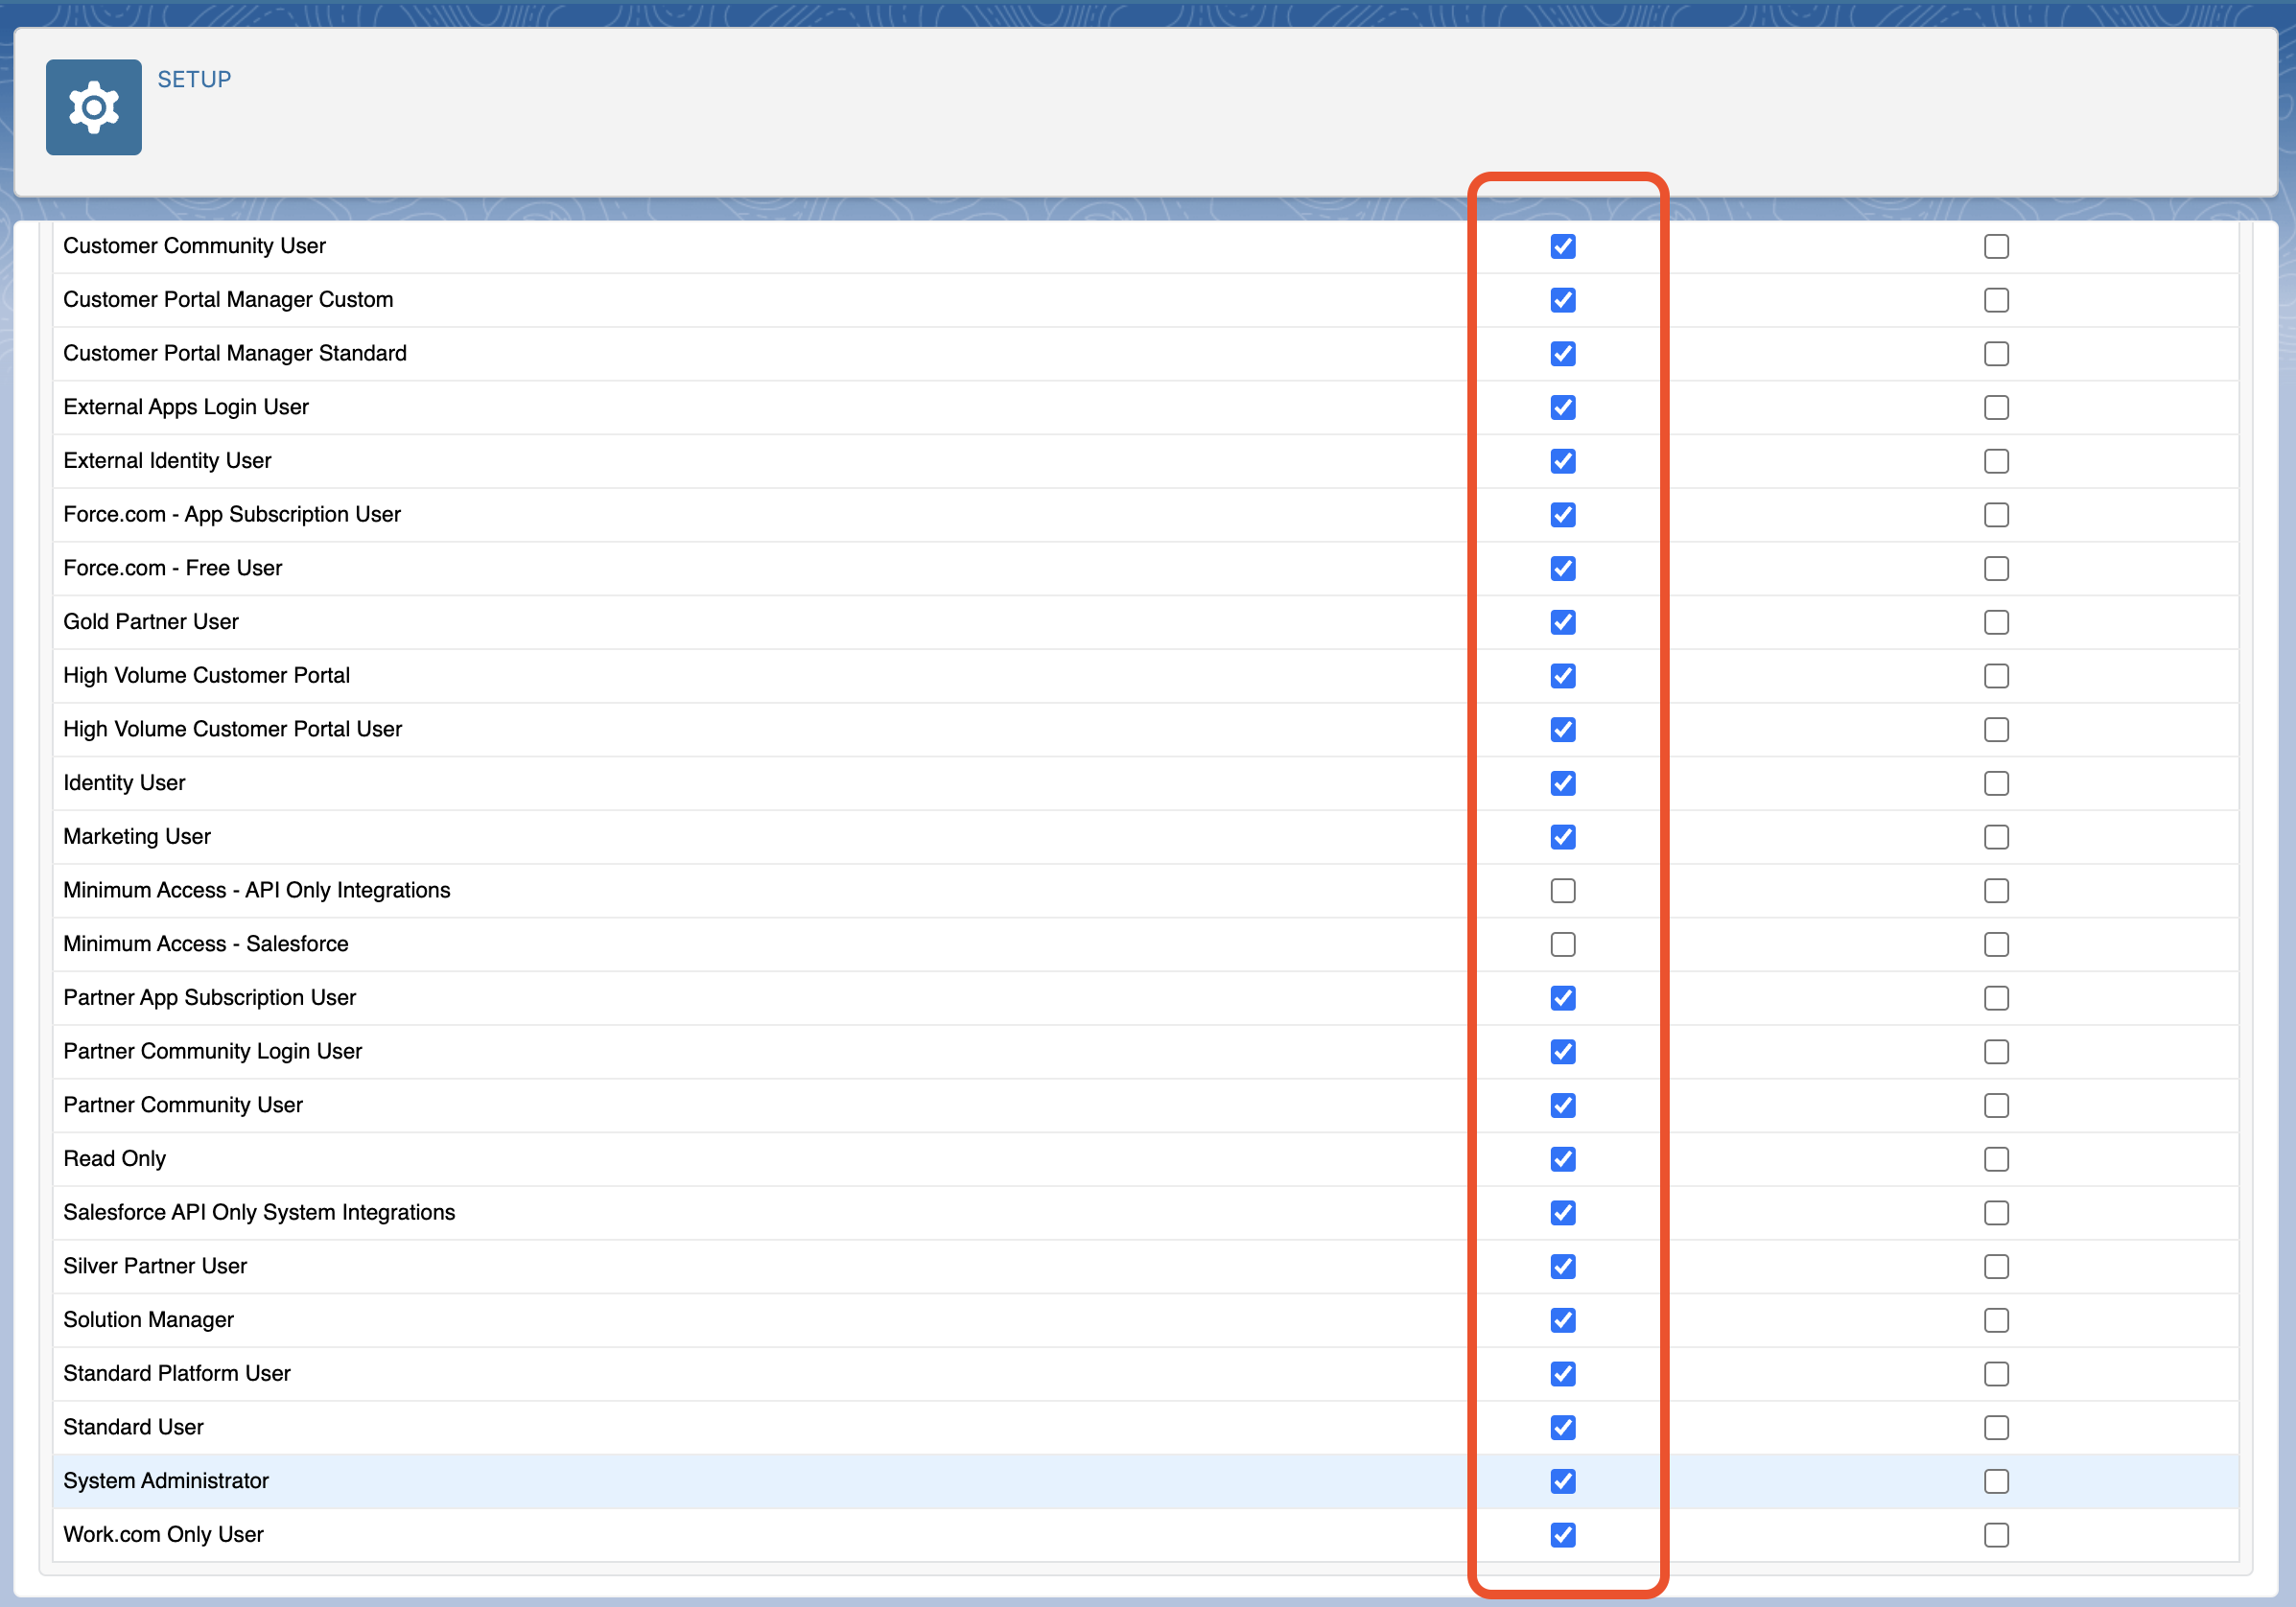
Ensure the "Visible" checkbox is checked for the account type used to connect Airspeed (typically System Administrator).
You may also create a permission set that grants access to all required fields instead of updating permissions individually.
Defining your Salesforce mapping
Airspeed can listen to your sales calls and automatically update fields (standard or custom) on your Salesforce objects (Contact, Account, Opportunity, other custom objects) within minutes of the call finishing.
In order to enable this feature, you need to let us know which fields you’d like Airspeed to update. Airspeed can then sync both your top-level MEDDPICC/BANT/SPICED information and additional custom qualification fields that you’ve already set up in your Salesforce or are about to set up.
To set up your Salesforce field mapping, go to Insights Settings and define your insight fields.
You can see what other customers track in Inspirations for custom insights.
Airspeed implements a default field update behavior in case the field already has some previous value. The default behavior depends on the field type:
Text: We append new information to existing value, together with the date of the call.
Picklist: We don’t update the value.
Number: We don’t update the value.
Multipicklist: We add any new values to the existing values.
This behavior can be adjusted based on your requirements.
Logging calls to Salesforce (Call Activity Sync)
Once a call is processed, Airspeed can automatically log it to Salesforce as either a Task or an Event. The synced record is associated with the matched Contact, Account, and/or Opportunity, and contains the Airspeed call summary as the description.
This is different from the 📄 Task Sync feature, which writes the action items extracted from a call (the next steps the call generated) as separate CRM Tasks. Call Activity Sync logs the call itself; Task Sync logs the follow-ups.

Choose how calls are logged
Salesforce can represent activity as either a Task or an Event. Airspeed supports three modes so you can match how your team already works in Salesforce:
Call Tasks only — every call is logged as a Task. Best if your team already files everything as a logged call/Task in Salesforce.
Events only — every call is logged as an Event. Best if your team works primarily off the calendar and prefers Events with start/end times.
Smart mode — telephony calls (e.g. Aircall, Outreach, SalesLoft) are logged as Tasks; everything else (video conferencing meetings, uploads, etc.) is logged as Events.
How to enable
Go to Settings → Organizational.
Click the ⚙ cogwheel next to the Salesforce integration.
Switch on Automatically Sync Call Activity.
Pick the mode that best matches your team: Call Tasks only, Events only, or Smart mode.
What ends up in Salesforce
For each processed call, Airspeed creates one Task or Event with:
Subject — the call title, prefixed with
[Airspeed]so you can spot Airspeed-synced activities at a glance.Description — the call summary generated by Airspeed, including key points, and custom insights.
Date / time / duration — the actual call start time and duration.
Type — the inferred Airspeed call type tag (e.g. Discovery, Demo) is set on the Salesforce Type picklist when a matching value exists in your Salesforce. If your org doesn’t have a matching value the field is left blank rather than set to an invalid value.
Owner / Assigned To — the call host. If there’s an associated Opportunity and the Opportunity owner was on the call, they take precedence; otherwise Airspeed falls back to any internal participant.
Related to — the matched Opportunity, otherwise the matched Account.
Name — the primary external Contact on the call. For Events, additional Contacts are attached and appear in the Meeting Digest when Shared Activities is enabled.
Note: If your Salesforce org does not have Shared Activities enabled, only the primary Contact will be linked to a synced Event. The remaining Contacts will still appear in the Airspeed call page; they just won’t be linked to the Event in Salesforce.
Avoiding duplicate activities
Before logging a call, Airspeed checks for an existing activity that already represents the same call — for example one that was created automatically by your calendar or telephony integration. The lookup uses the call’s date, the call title, and the call’s associated Contacts/Account/Opportunity. If a match is found, Airspeed updates that existing record with the call summary instead of creating a new one.
Moving between Salesforce and Airspeed
You can view your related CRM records straight from Airspeed.
Calls
Any objects related to a call will be listed, and you can click to jump straight to that record within your CRM.
If you have Airspeed's CRM sync features enabled we'll also highlight which records Airspeed has updated for you ✅
.gif")
Similarly, your notes exported to Salesforce will have backlinks to Airspeed so that you can always go back to the relevant call:
.png")
Deals and companies
The deal and company pages contain links to the relevant Salesforce accounts and opportunities in the header:
.png")
Airspeed also automatically collects all call participants across calls in a opportunity or with an account. If the participants exist in your Salesforce, Airspeed will show links to the relevant Contact objects:
.png")
Account link in Salesforce
You can automatically populate a specified field in your Salesforce Account object with a link to the associated Airspeed company/deal page. This makes it easy to navigate from Salesforce to Airspeed, where you can view all insights and interactions related to the Account.
How to Enable
Create the Field in Salesforce:
Add a new field in your Salesforce Account object where you want the Airspeed links to appear.
Configure Airspeed Settings:
Go to
Settings->Organizationalin Airspeed.Click on the cogwheel next to the Salesforce integration.
Under “Airspeed link field”, enter the API name of the field you created in Salesforce.
.png")
Note: This will only populate accounts associated with new companies that appear in Airspeed after setting the field. If needed, it is possible to populate the field for existing companies as well. Contact support for assistance with this.
Contact creation
Airspeed can automatically create contact or lead records in your CRM for external call participants who don't already exist in your system. This helps ensure that all your important prospects and customers are properly tracked in your CRM after every call.
After every call, Airspeed will:
Identify External Participants
Determine which call participants are external to your organization.Check for Existing CRM Records
Search your connected CRM to see if these external participants already exist as Contacts or Leads.Create New Records If Needed
For any participants not found in your CRM:If the participant’s company has an existing Account in Salesforce, Airspeed will create a new Contact associated with that Account.
If no matching Account exists, Airspeed will create a new Lead instead.
To enable it for all your future calls:
Go to Organizational Settings
Click on the cogwheel ⚙ next to the Salesforce integration
Switch on "Automatically Create Contacts".

How Airspeed Associates Your Calls to Salesforce Opportunities
Airspeed automatically associates your calls with the right Salesforce Opportunity in three steps:
Step 1: Identify External Participants
Airspeed identifies external attendees on your call and matches their email addresses to Contacts in Salesforce.
Step 2: Find Relevant Opportunities
Airspeed looks for Opportunities tied to those Contacts, prioritizing deals where a participant is listed as the Primary Contact.
If no such Opportunities are found, Airspeed expands the search to include all Opportunities linked to the participants’ Account .
Step 3: Select the Best Match
From the pool of relevant Opportunities, Airspeed applies timing logic to choose the most appropriate one:
Highest Priority: Opportunities that existed before the call and are open.
Medium Priority: Opportunities that existed before the call
but closed on the same day.
Lower Priority: Opportunities created within two weeks after the call (capturing new deals that may have originated from the meeting).